The Forces
Here is the NPC force defending Ravola. Any walls without these soldiers are to be manned by peasants, servants and the city’s meagre inhabitants, which are not shown here. Such walls will have however many such ‘peasants’ can fit on them.

The NPC characters and forces in the campaign feature prominently in the stories, perhaps because as GM I can publish what I like about them? The players, however, are often (understandably) cagey about what is revealed concerning their plans, resources and difficulties in such stories! This is a competitive campaign, after all, in that the players want their character’s to do well.
Perette, the ‘fallen damsel’ will command the force as a whole, with Baron Garoy commanding his little company of knights. The reasons for this will probably come out in the battle report story.

As well as the knights, there is a second mounted company of ‘Brabanzon’ light horsemen, who can act both as archers and spearmen. The player was given the option of dismounted one or both of these companies and putting them on the walls, but he chose not to. “Stick some peasants on any empty walls” is what he ordered. He was intending to use these either to attack any skaven who breached the defences (one way or another) or, if the opportunity arose and it seemed beneficial, perhaps to sally out?
Perette is shown here, and the Brabanzon foot. She is a level 2 wizard now, so will have two fire spells. It is rare I make such unrolled for decisions or alterations for NPCs, but I will do so when events strongly suggest it. In a cause and effect sort of way. She did very well with her magic during the two assaults of Campogrotta, and had gained a new authority since then, as well as much respect. So I upped her to level 2 rather in the manner of roleplaying game experience points!

The two companies of Brabanzon foot are archers. We are not using the old Warhammer Bretonnian list for the Brabanzon mercenaries, but instead, as appropriate for mercenaries operating more like Tileans than the norms of their own land, we used our non-official campaign Tilean army list. It is an old internet campaign list which was not made by me but, with various tweaks to suit my own version of Tilea (such as priests of Morr as well as Myrmidia), has proved very useful for representing many an army in this campaign, both player and NPC. These are longbowmen and ‘brigands’ with short bows.
The artillery
The two engines featuring in the prequel story are seen here – an old Citadel Miniatures’ trebuchet and crew and a kit-bashed monstrosity I cobbled together years ago in lieu of a Helblaster. The latter just so happened to look like exactly what would result if a dwarfen engineer fixed six leadbelcher barrels together. That, and the fact that the ogres had indeed only been allowed to march away if they laid down their arms, as well as that the dwarfs sent to assist Garoy and the Brabanzon had been commanded by an engineer (they though, after all, they would be besieging the city) meant I just had to use it. I crafted rules for it almost identical to ogre leadbelcher rules, but with the chance to misfire and a suitable table to roll on.
The light gun is a Perry Miniatures model, I think. I used the campaign list’s horse artillery stats and rules but ditched the dashing around behind a horse aspect!
…
The Skaven force is a player-army, although they are my figures. The actual campaign player would command this force, while another player volunteered to command the defending NPC force. More action for everyone!
This is only a fragment of the player’s full force. For a start, only part of their realm’s full strength was near Ravola, and even then, the machines were left behind in the tunnels. I warned the player (well, not me, his NPC advisers) that to get his several war engines out would take several days, and thus give the defenders more time to prepare. Perhaps they would send for relief? Dig traps? Prepare some ruse? This suitably ruffled the player, and he decided to leave the machines and take the city quickly with his warriors alone!
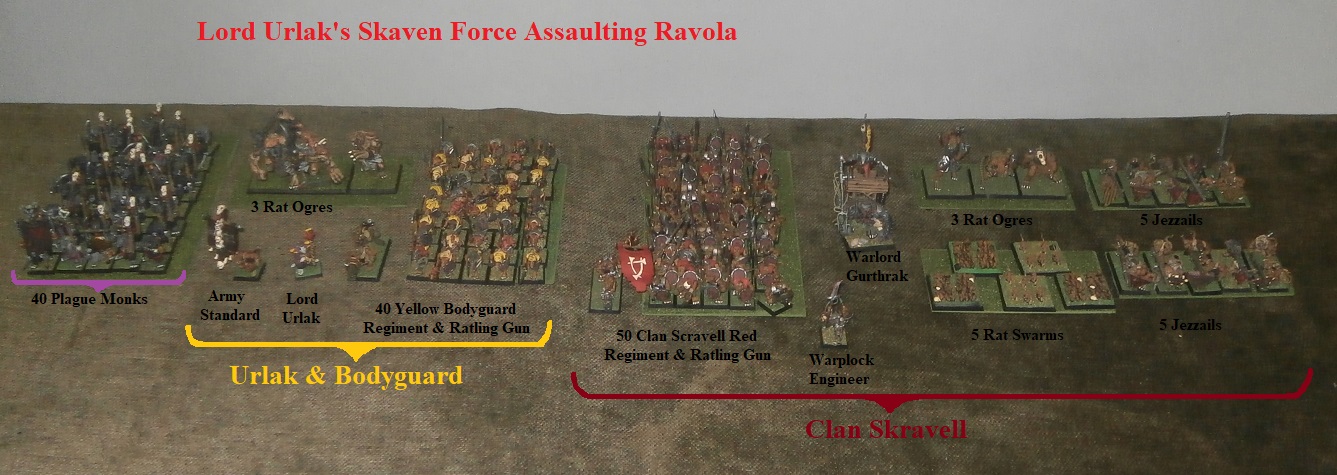
The commander is a Grey Seer called Lord Urlak. (His second name is a mess of letters meant to be confusing. The trick worked, even I can’t recall it! ‘Ushocrochoshor’ or some such monstrosity!)

He has his bodyguard with him, in the form of his army banner bearer, the 40 strong yellow regiment of clanrats and three rat ogres.
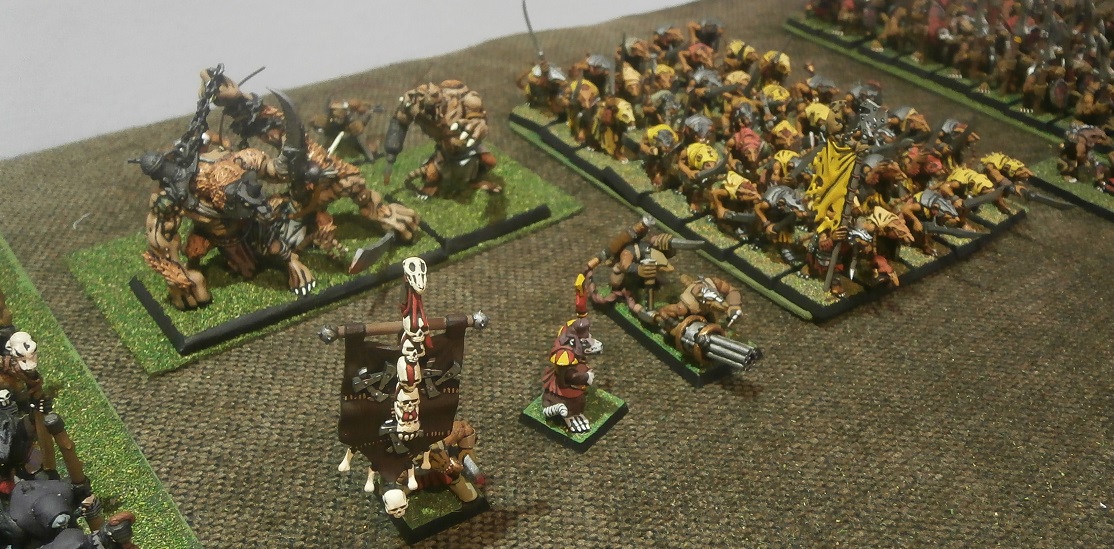
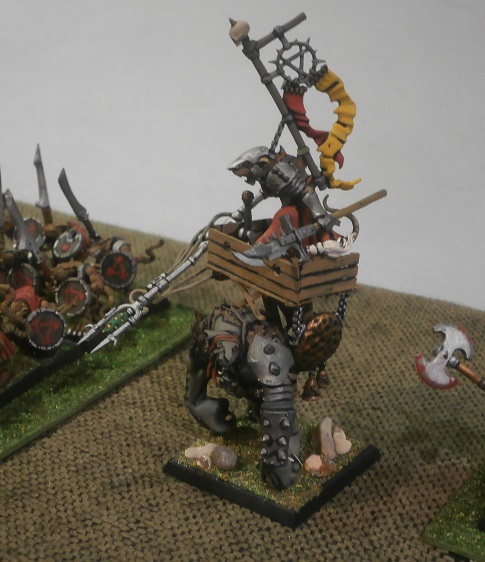
Warlord Gurthrak commands Clan Skravell, one of the clans under Lord Urlak’s rule. Gurthrak himself rides a Bonebreaker
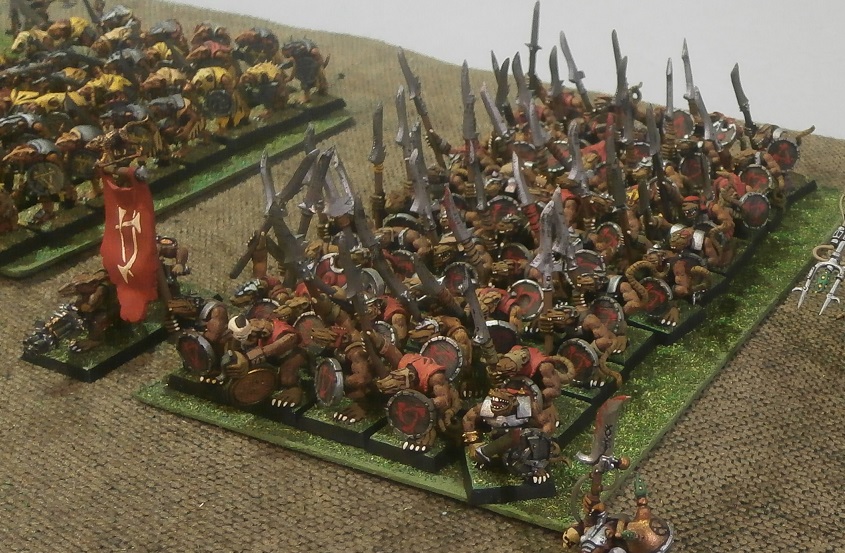
There are three other rat ogres in his clan’s little army. The clan’s main unit is the ‘red regiment’ (they have a red banner), being 50 clanrats strong, plus a ratling gun.
The clan also boasts two companies of 5 jezzails and some rat swarms, as well as two engineers to tend their war machines. One was back with the machines at the tunnels, supervising their extraction, but the other was here with his warpmusket.

The last element in Lord Urlak’s force is a large regiment of 40 Plague Monks – Clan Pestilens is one of the investors in his joint-stock war! They don’t have their plagueclaw catapult with them (see the comments above regarding exiting the tunnels). These are a mixture of plastic GW figures, and metal Black Tree Designs’ Pestilential Priests.

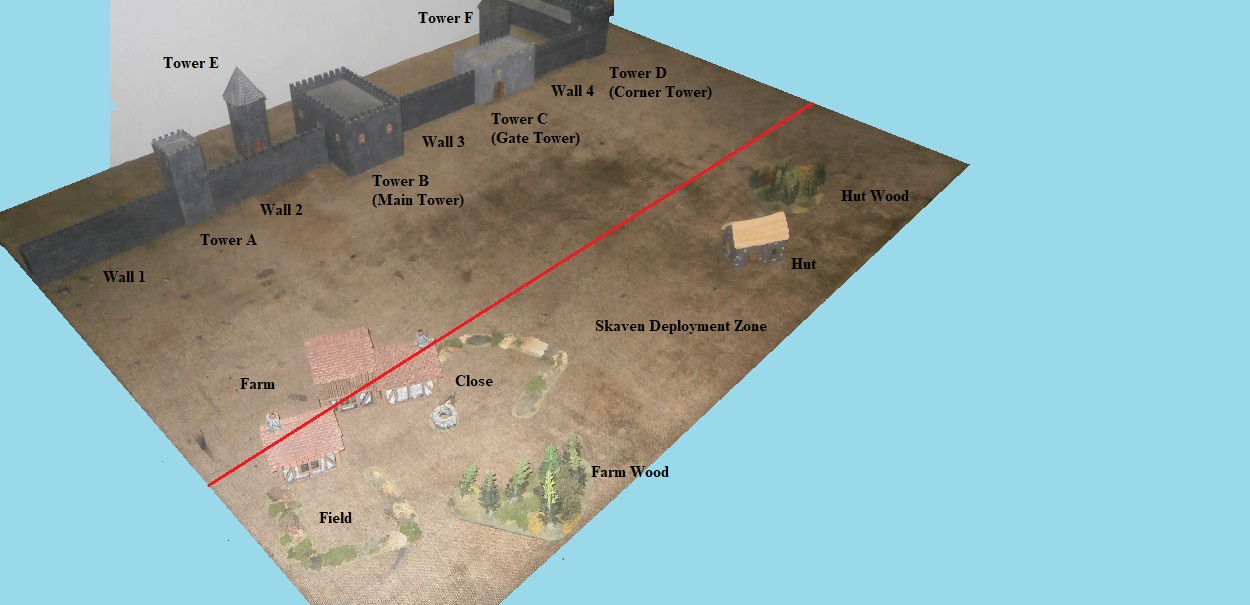
The Field of Battle
This was easy to set up as I had pictures from the last wargame played at Ravola, when Razger Boulderguts’ ogres had seized the city three game-world years earlier (in the real world, back in 2014!) I just perused the pics, found the same scenery and slapped it down.
The Rules
Our campaign has rules for fighting an assault such as this, based on the old Warhammer rules, some going back as far as sixth edition or earlier. These have been modified throughout the campaign as we incorporate new ideas that come up during play, and deal with problems and the like. Basically, it is a 7 turn game (sometimes 8 when the GM thinks it appropriate, and a die roll allows) in which the victor must try to control the greatest number of the defences’ ‘sections’ by the end of the game. Each tower and stretch of the wall is a section (see the picture above), and there are two further sections inside – left and right. To control a section you need an unengaged and non-fleeing unit (or character) in a section, and no non-fleeing enemy models. By the way, the two inner towers (E and F) on the picture above were not official sections, although they were in the internal sections. In this game there were 11 sections to play for, which included the side wall not labelled above. (That wall could only be reached from inside the city, due to the steep stone footings beneath its outside!)
We have our own rules for assaults by ladders (not easy at all) or siege towers, although once on the defences, the fighting between sections is basically the standard fighting in buildings rules from the 8th ed’ rulebook.
Oh, and due to the pandemic we used ‘Play by e-mail’ for this game, thus, for example, all the pictures above are just some of the many, many pics I sent to the players before and during the game, often with notes, arrows and measurements edited on to them. I hope to do a separate ‘Game Notes’ essay all about our play by e-mail odyssey.
